My little venture into tuning my new room...

MartinLogan Audio Owners Forum

Help Support MartinLogan Audio Owners Forum:

This site may earn a commission from merchant affiliate links, including eBay, Amazon, and others.

Jimna

Well-known member
Joined
Oct 6, 2009
Messages
644
Reaction score
1
Location
Denver, CO
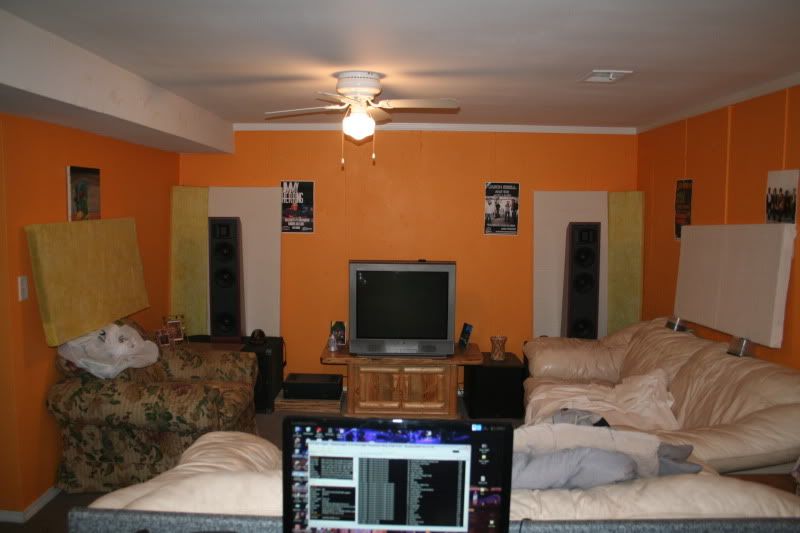
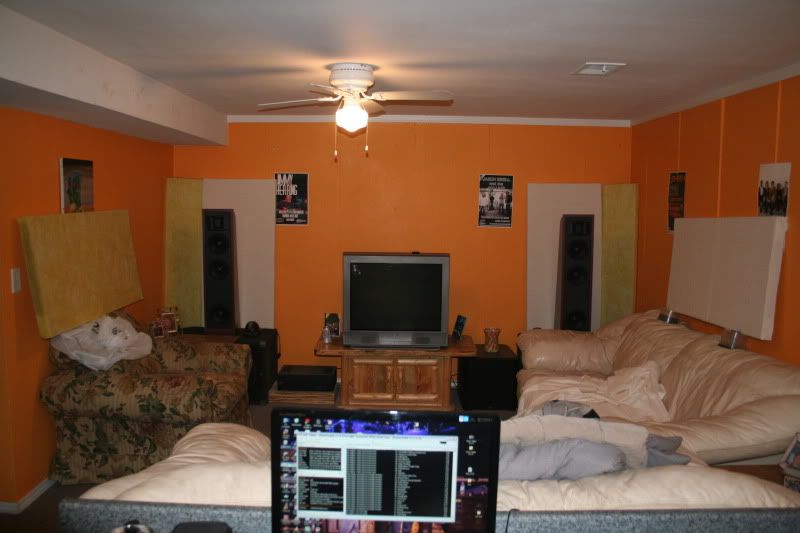
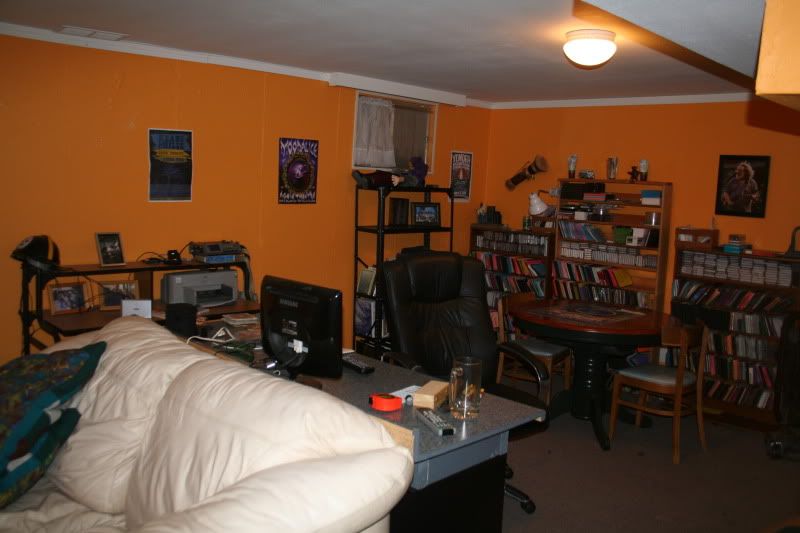
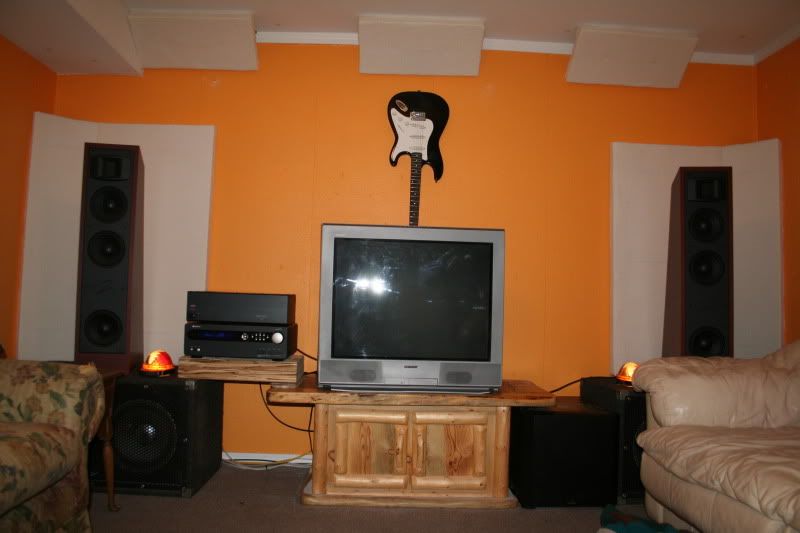
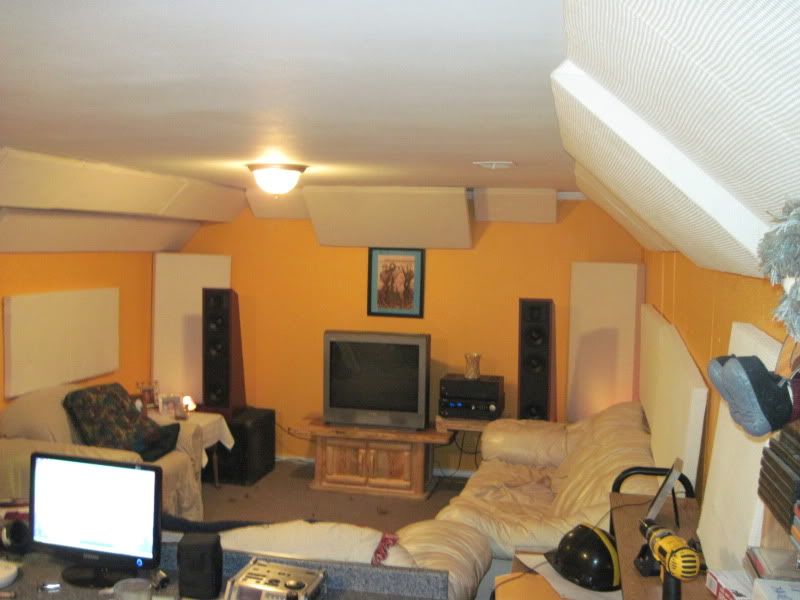
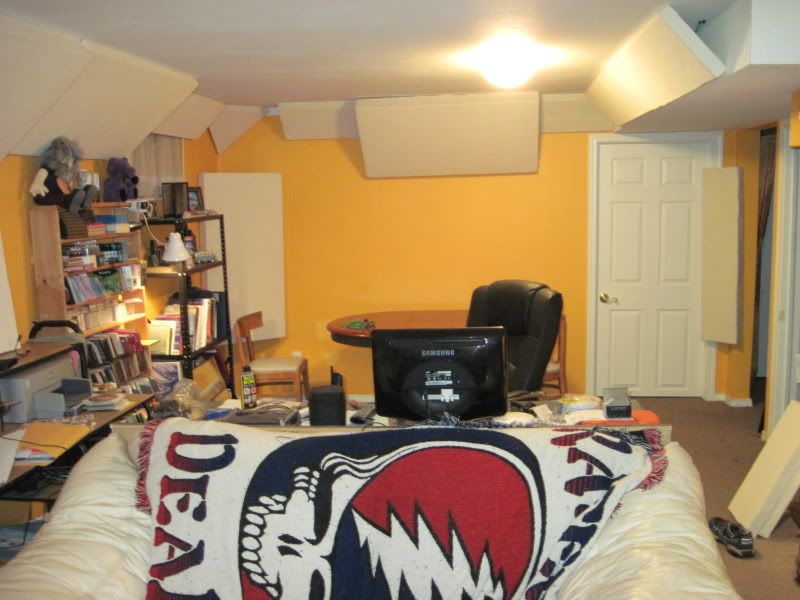
i got this stereo when i was living at a different place so i had a feel for its post break-in sound. last august we bought a house finally, and the basement minus a guest room and storage was mine make my man cave. it was already finished and painted in yellow which i didnt like in the beginning but has grown on my allot, mostly because it brightens the place up nicely given its subterranean lack of light...and it gives that feel of Steelers colors which are ingrained in my soul, but i digress. But unfortunately as soon as i turned the stereo on in the new room i was disappointed. first off the room is considerably larger, its 12'8"W X 25'L X 7'4"H while the original room i got to know the system in was 12'x12' but had a drop ceiling and some favorable qualities for a small room, plus my listening seat was in the perfect place. the new room has 2 walls that are painted concrete(foundation) with the rest finished sheet rock. the echo was ridiculous while the bass was boomy and muddy as hell, i had the dreaded one note bass effect. it was almost an unusable room it sounded so bad, the highs caused listener fatigue so dramatic my listening was cut way back.... i was not a happy boy. it was like i took a step backwards sonically and i had no choice but to take action, so i did.

it has been quite the project, much bigger and more work than i originally expected. It has been 100% DIY and low budget enough that i thought i would share with others in case anyone else is interested in doing this for themselves. all told i guess ill have about $400 in the whole thing....minus buying a house that i can do this too. it could have been done cheaper but i made the mistake of buying my first batch of panels online and paid way to much. i found a local supplier for everything after that which saved me a ton of $$, plus i rocked the jo-anne fabric sales catalog and never got less than 40% off all my fabric. to buy all the bass traps and HF traps as finished products from a vendor to do all i have done would cost a fortune. Long live DIY!

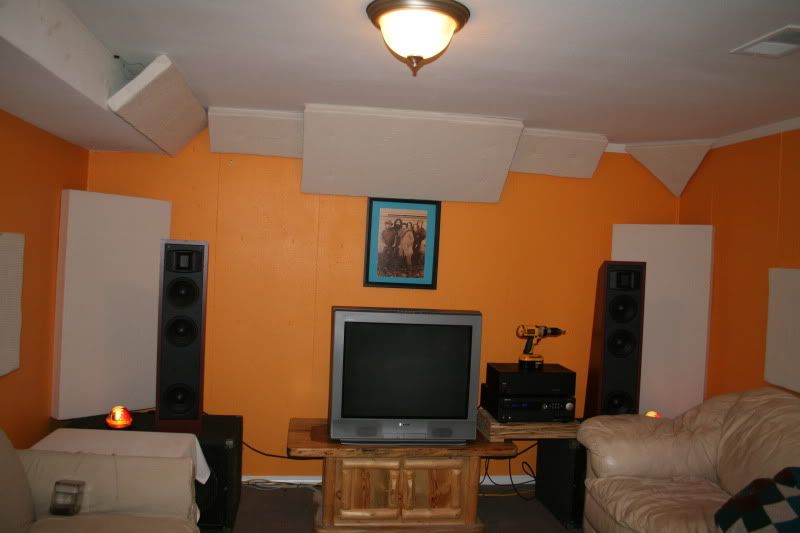
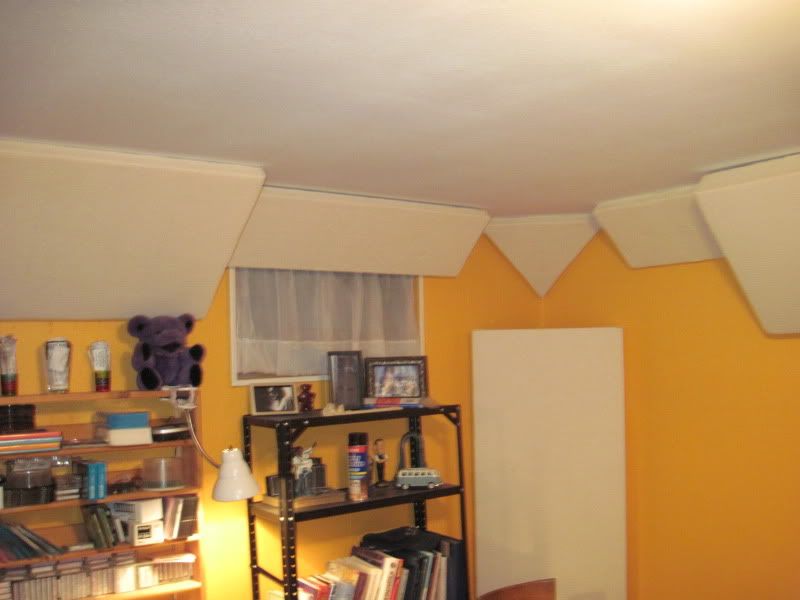
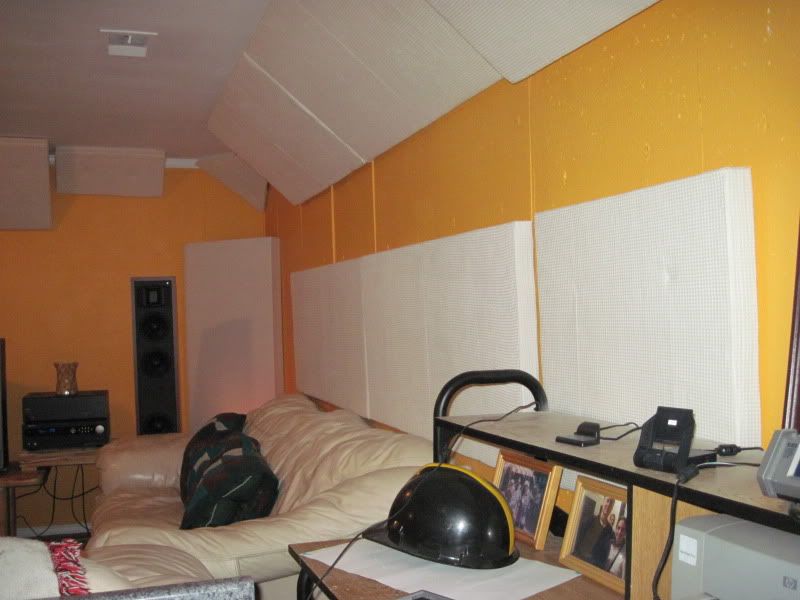
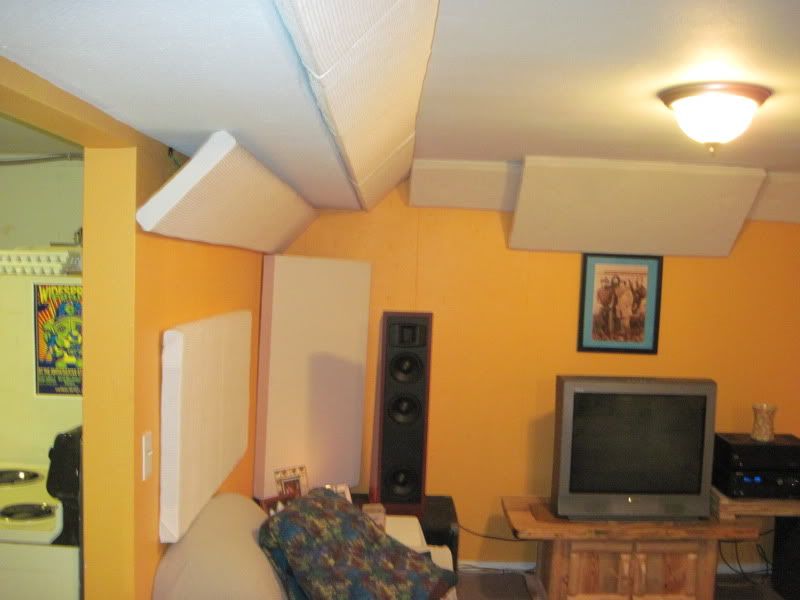
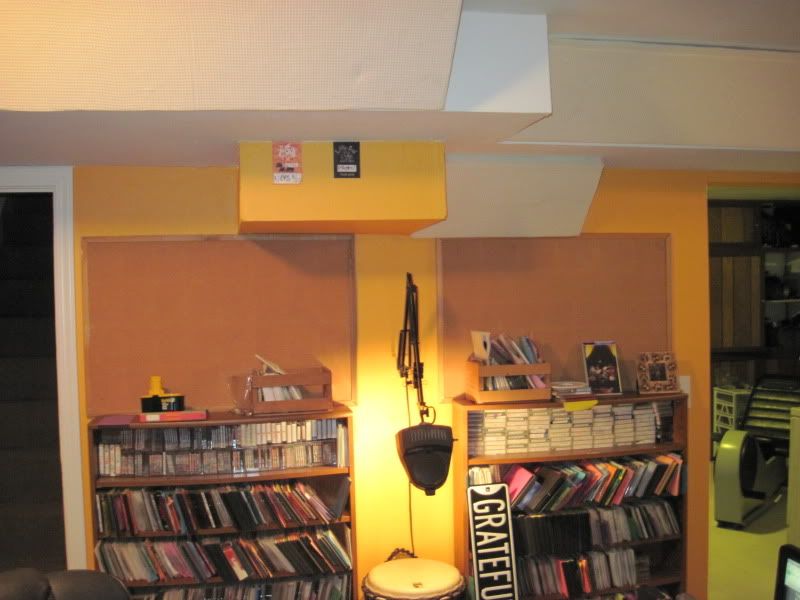
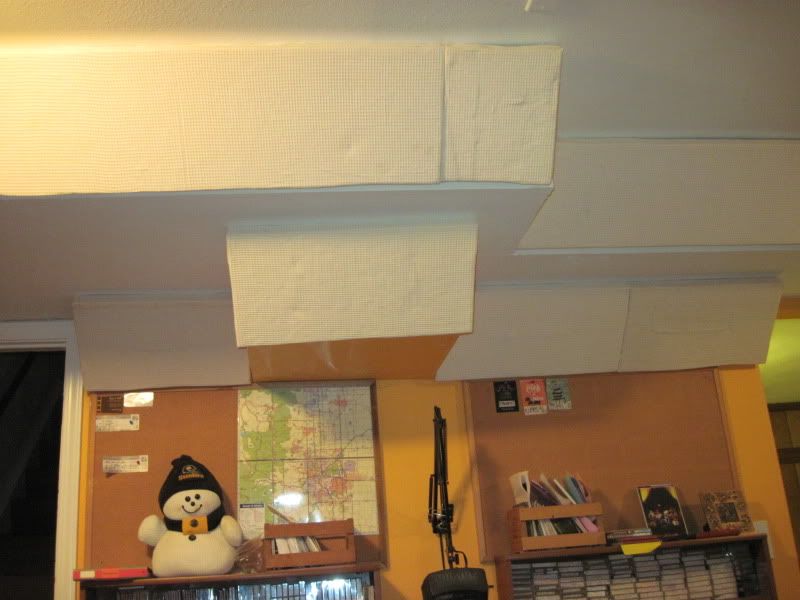
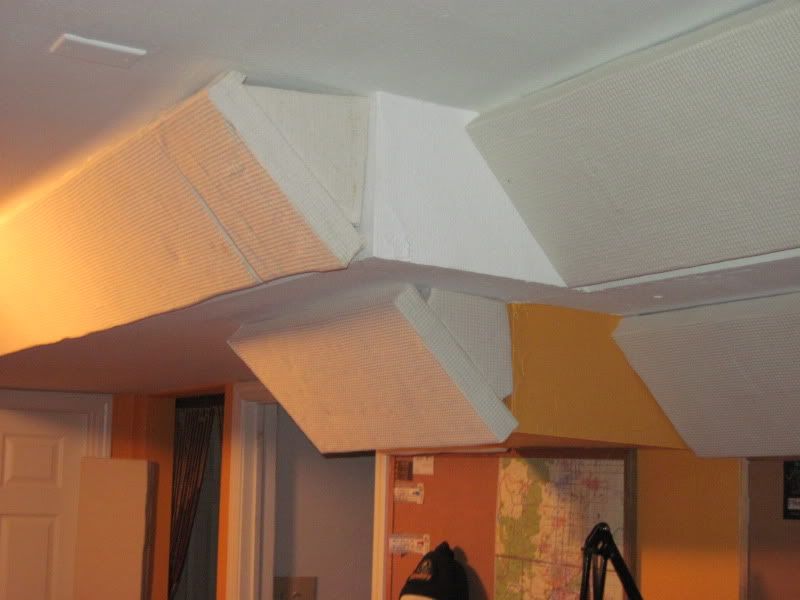
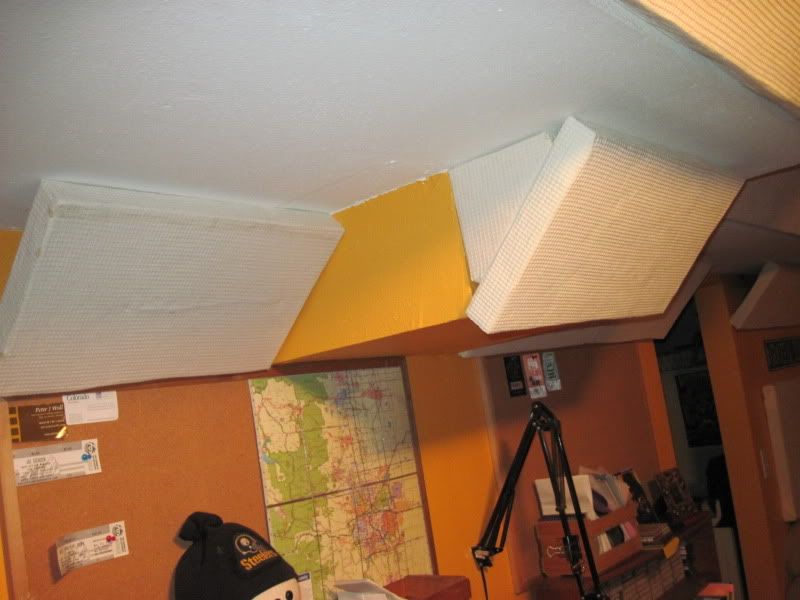
after a ton of research i decided used a combination of theOwens Corning 703 (3lb p/sq' fiberglass for mid-bass absorption) and the 705 (6lb p/sq' fiberglass for deeper bass absorption) in both reflective and absorbent facing, making a variety of low FQ bass traps and absorbent broadband traps. my goal was to attempt to get as close to 100% corner coverage as possible. (Low FQ and undesirable sound in general live in the corners, that is why band shells and good theaters have rounded corners everywhere with a giant sloping front wall) all the traps were also made in a variety of 2" and 4" thicknesses in both density panels to get a better over all frequency control from 35-500mhz. everything over 500mhz is then handled by the high FQ absorbers at the first reflection points plus the evenly placed unfaced traps through out the room too. my goal unlike high school is flat. ;)

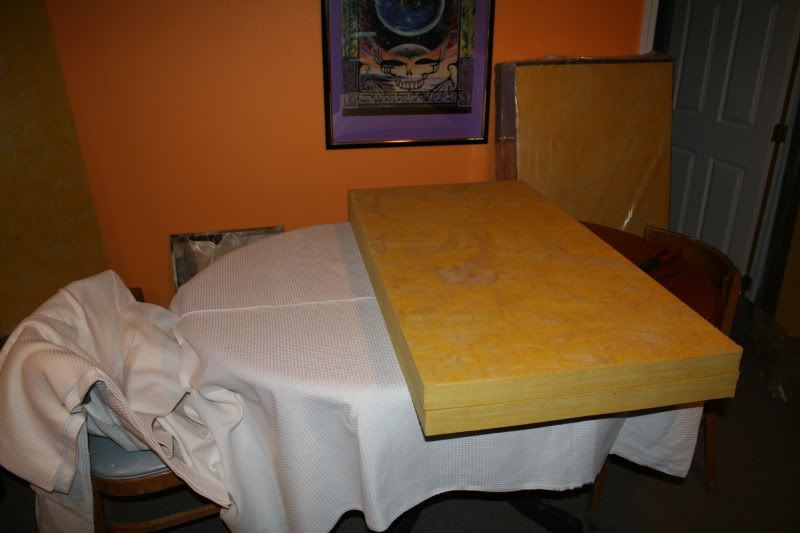
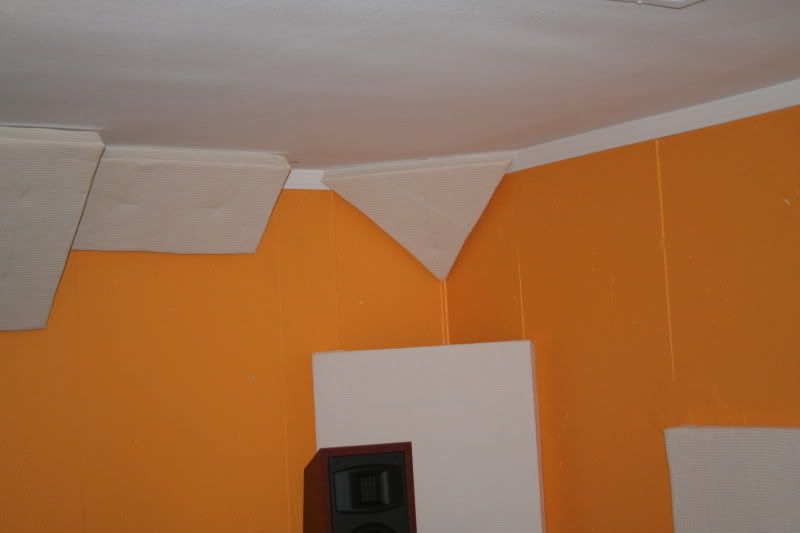
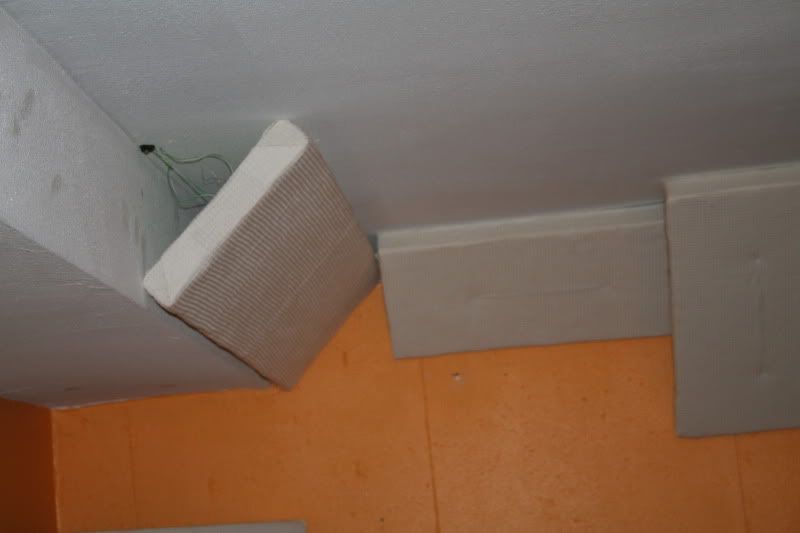
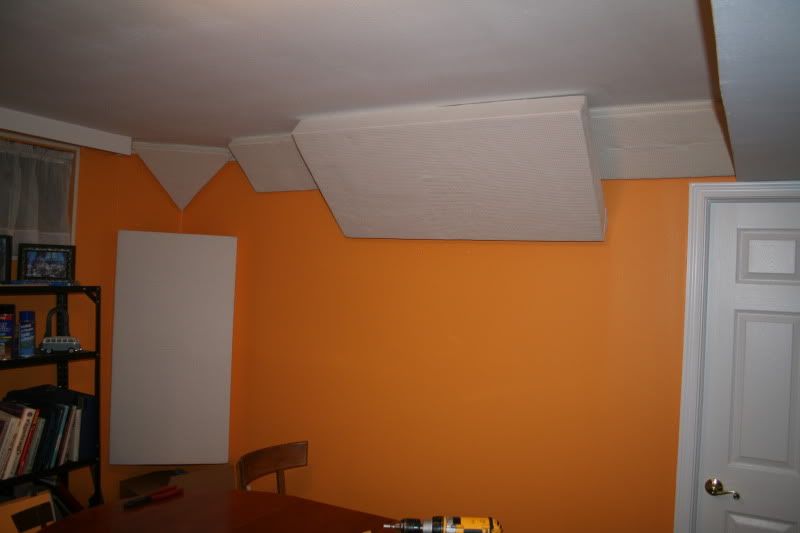
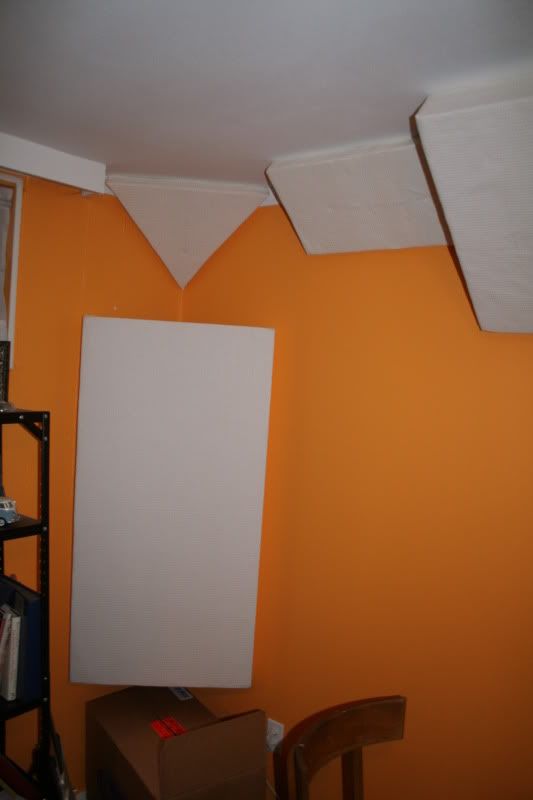
here are some pics from the start of the project:
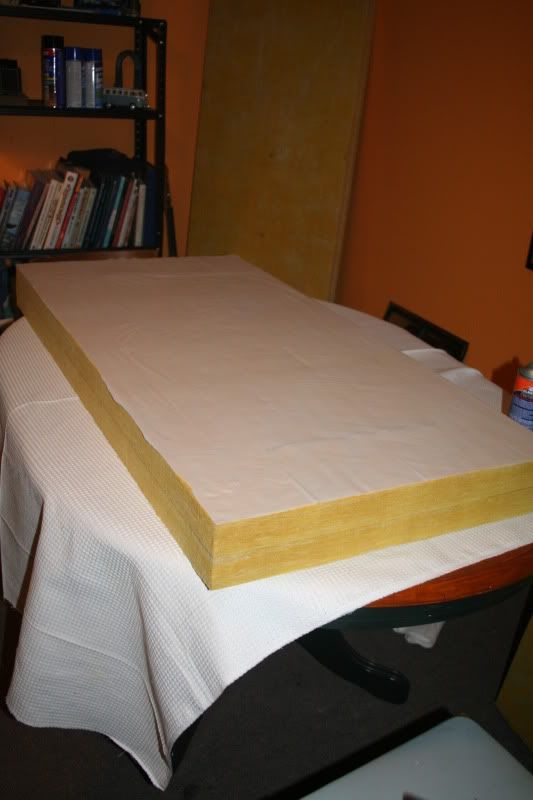
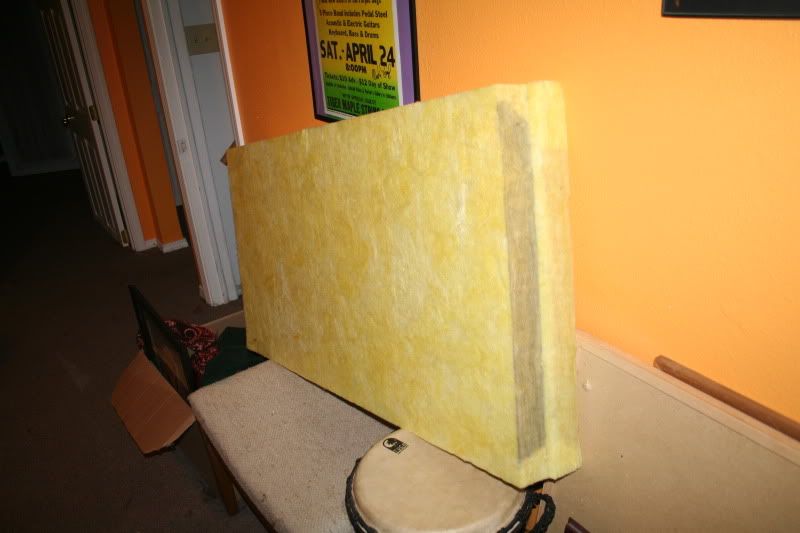
2 OC 703 panels 2' x 4' 2" thick
IMG_2663.jpg


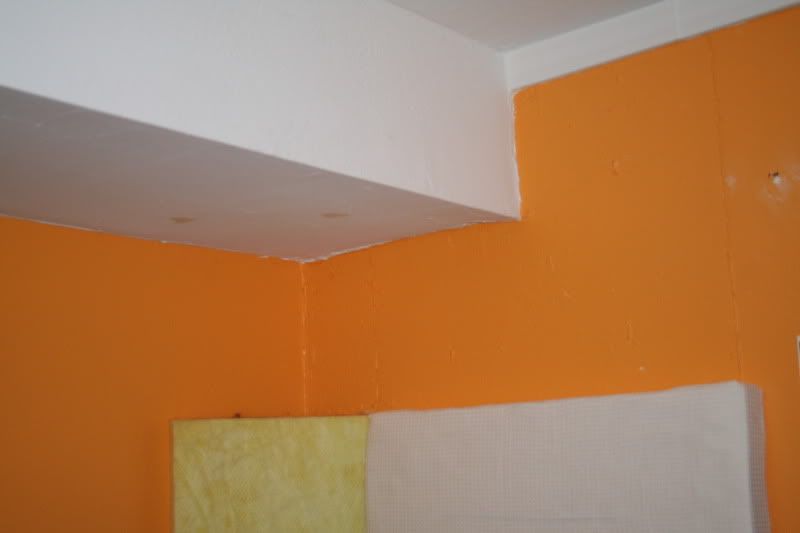
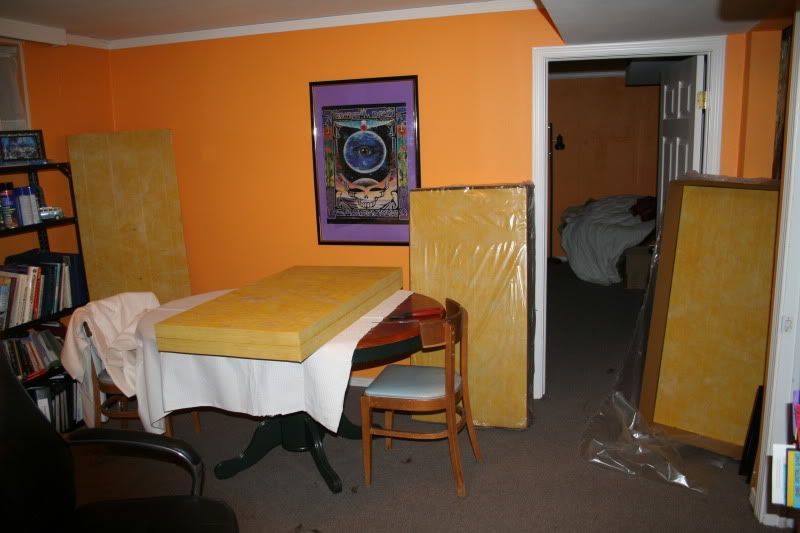
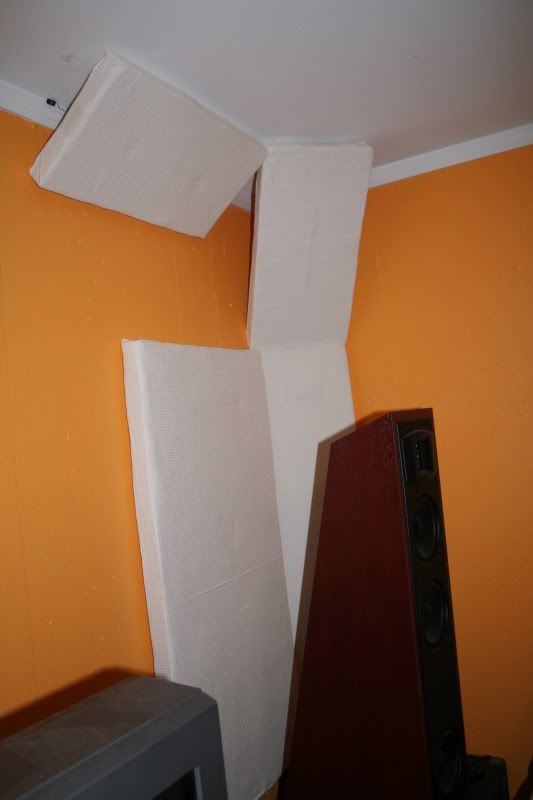
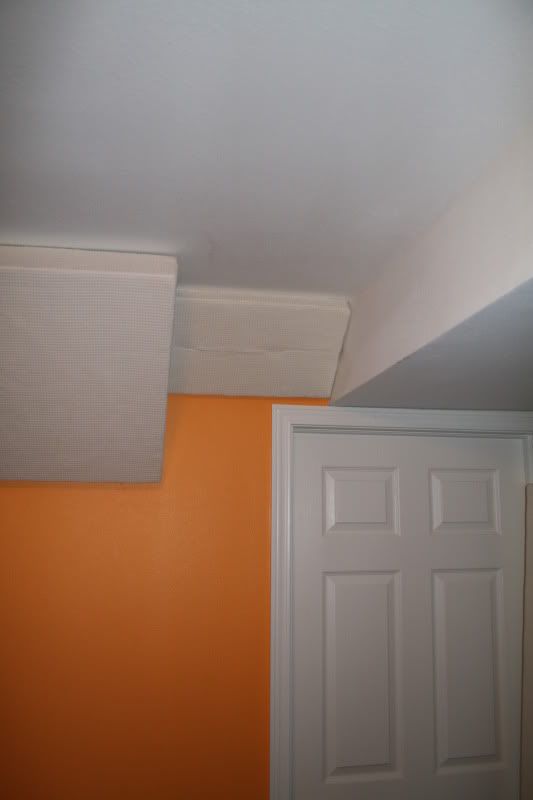
the corner of the 2 concrete painted walls
IMG_2662.jpg


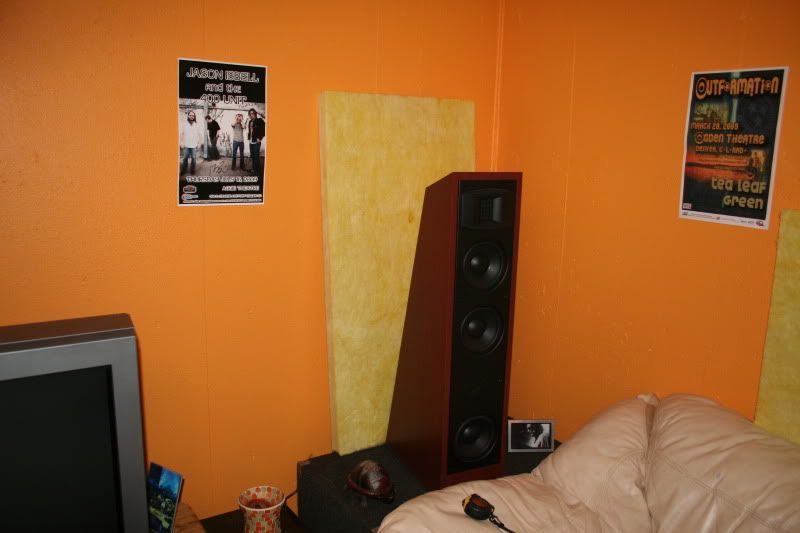
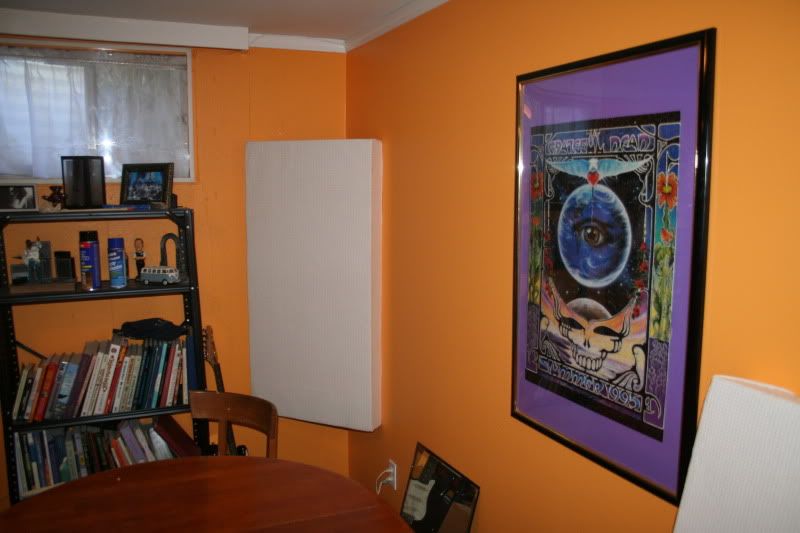
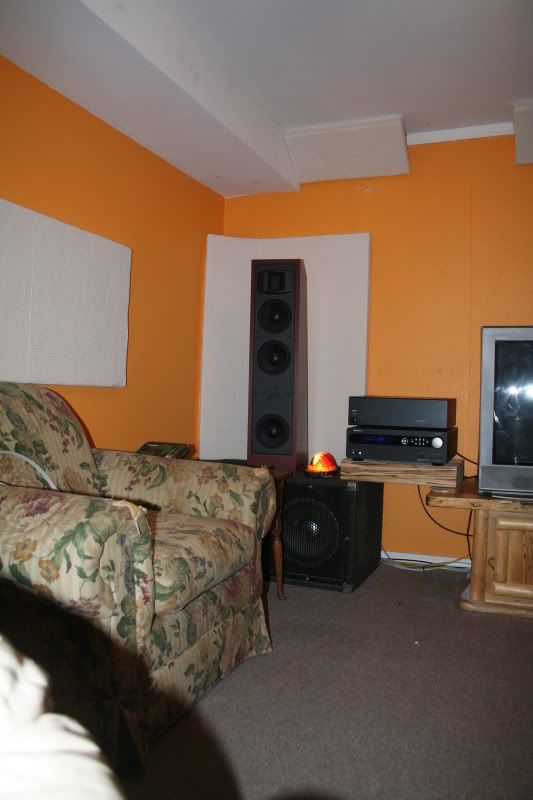
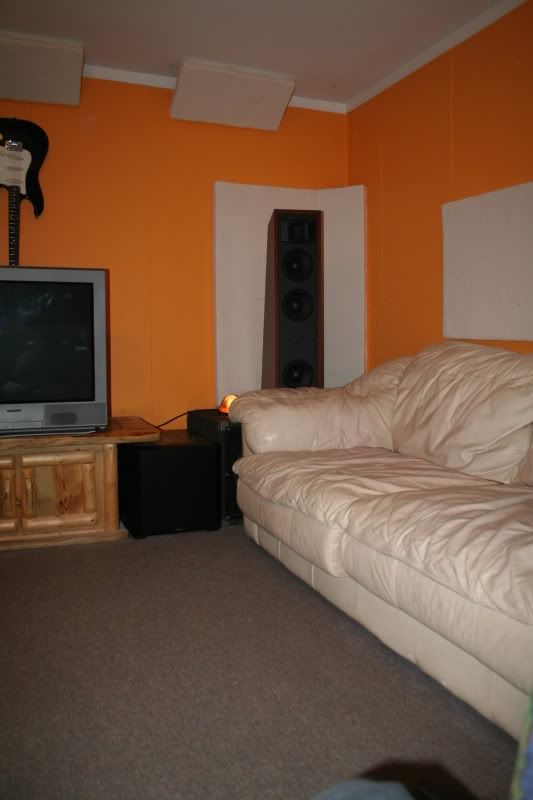
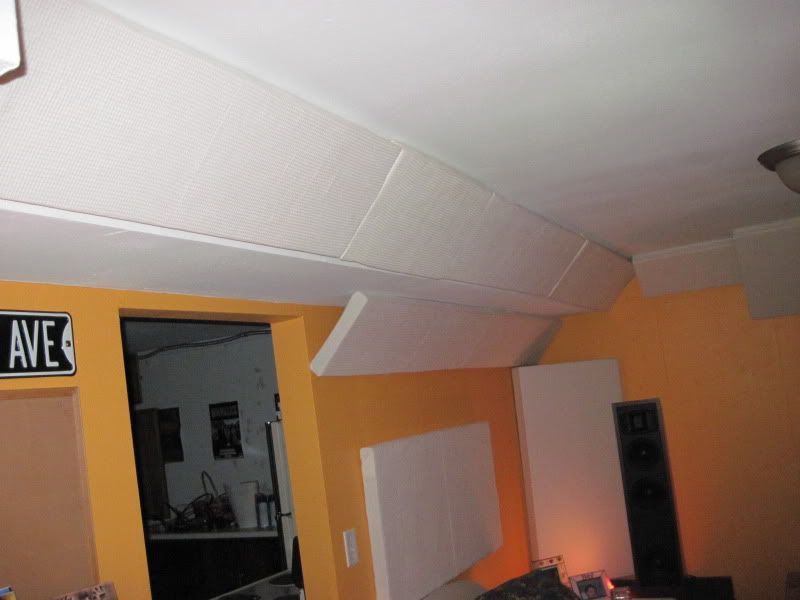
first reflection point on left
IMG_2664-1.jpg


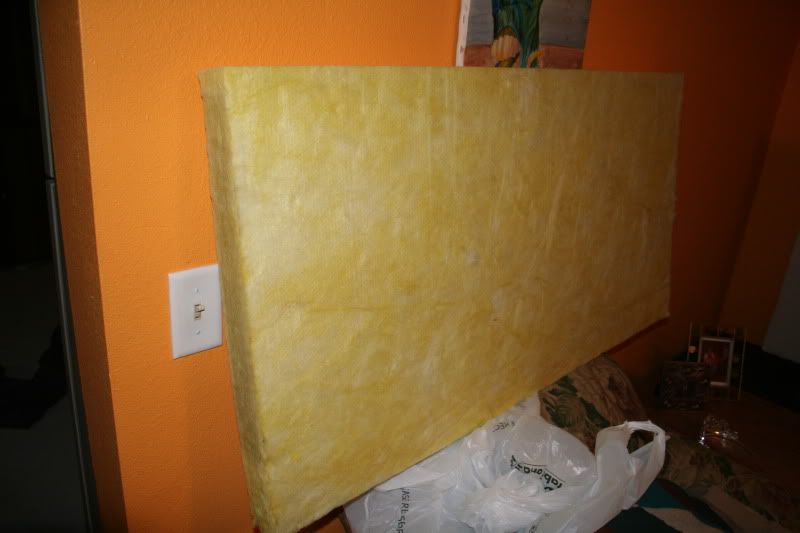
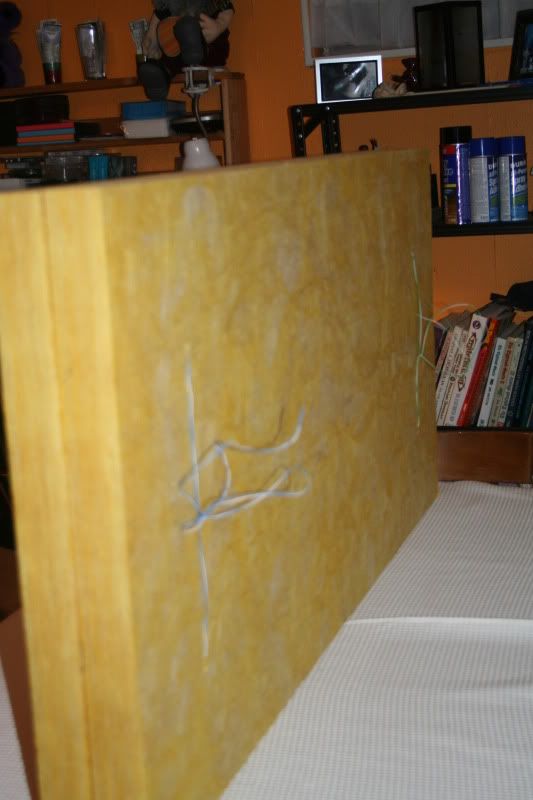
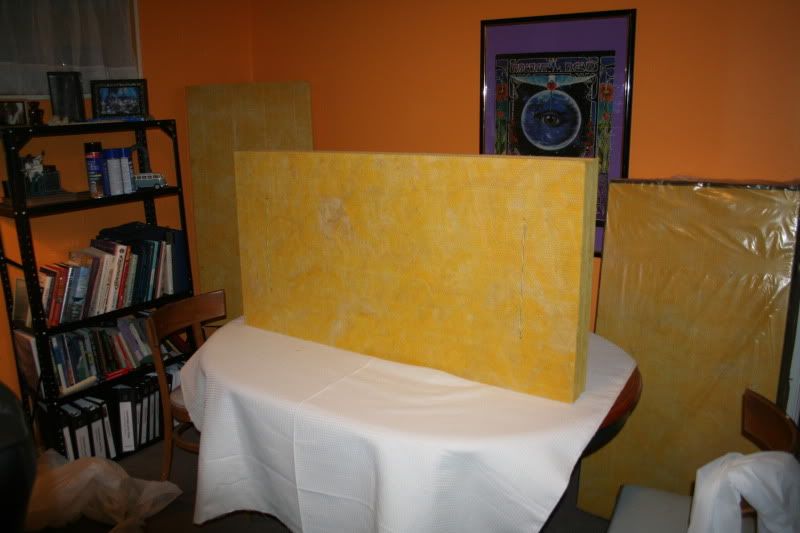
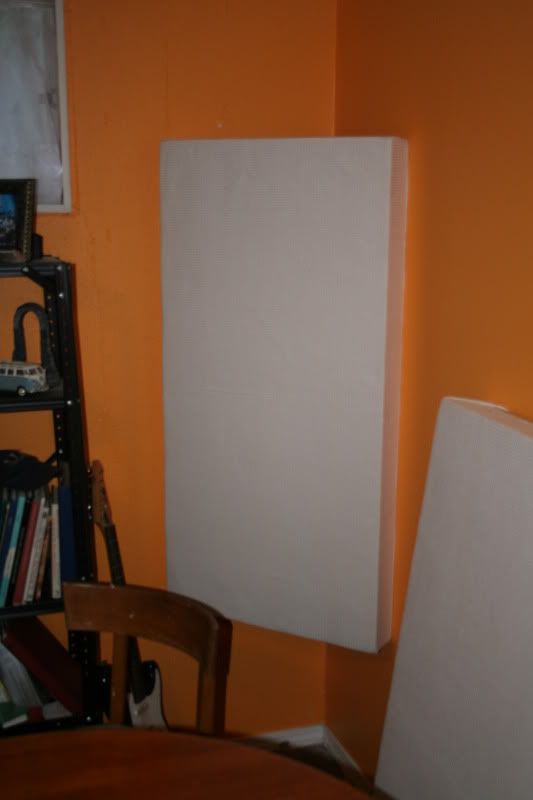
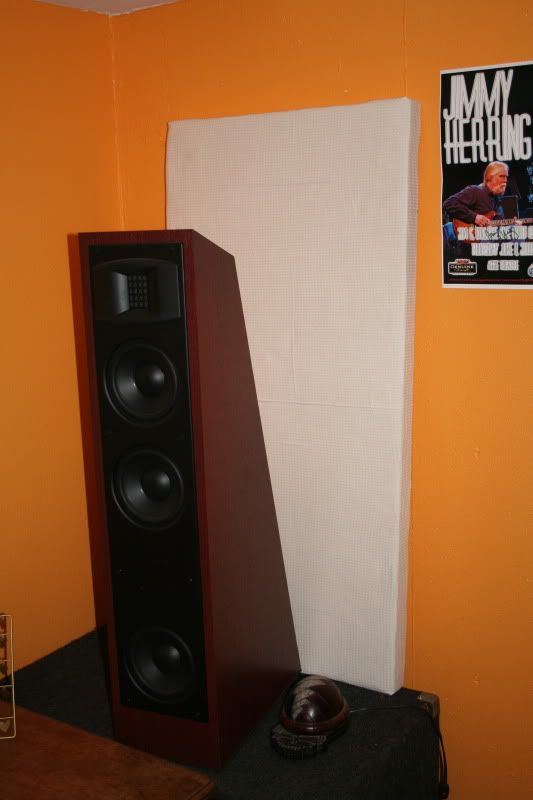
first panel i finished
IMG_2665.jpg
 
Last edited:
front of the room with the first few panels in their possible new homes, proped up of course
IMG_2667.jpg


this HVAC that was finished around was a huge challenge. symmetry is key to a good room so it really presented a problem.
IMG_2673-1.jpg


as you can see i had quite the puzzle in front of me
IMG_2668-1.jpg


IMG_2712-1.jpg
 
here is how i made one of my low FQ bass traps, but all traps and panels were made in the same basic way. the only difference was the thickness or size i cut the panel to, and whether or not i used the membrane for facing to reflect high FQ sound waves. the membrane serves 2 purposes, on the higher density panels it helps causes them to reach a lower FQ response while reflecting all high FQ waves making them a true bass trap and it keeps the rooms lively feel allowing me to maximize the bass trapping while not over deadening the room. all the traps were covered in a waffle weaved muslin fabric i got at jo-anne fabric. its not the cheapest muslin available but i had to keep in mind that i could be looking at this stuff for a long time and so i spent the extra cheese on aesthetics. all that really matters when choosing the fabric is that it is acoustically transparent.

panels, fabric, and work space + rear wall before any treatment
IMG_3254.jpg


IMG_3255.jpg


i used multiple strands of phone wire because i have an unlimited supply of it for free and i really tried to keep this as low budget as i could, but any strong wire(or doubled up like i did here) will work. I threaded it through the middle of the 2 glued together 2" panels to suspend them. amount of wire varied by weight of the trap or panel, on these i used 4 because the high density panels are heavy enough plus the muslin isnt the lightest fabric either.
IMG_3258.jpg


IMG_3259.jpg


IMG_3256.jpg
 
this is the membrane that reflects high frequency sound waves while allowing the lows to pass through and be absorbed. i used 3mm gardening plastic + the heavy plastic the fiberglass came packaged in. the point of reflecting the HF waves is to keep the room sounding live and while still sopping up and absorbing all the deep or muddy lows, which additionally the membrane helps to absorb to a lower FQ then without the membrane(down to 35mhz!). this is mostly effective in corners where the air pocket behind the trap is maximized, therefore not nearly as effective on a flat mounted panel with minimal or no air pocket.
IMG_3260.jpg

the muslin underneath it is glue on using a can of spray adhesive. any brand works as i tried them all as they came up in sales. theu muslin went on much like wrapping a gift.

and this is a finshed low FQ reflective basstrap, corner mounted for maximum effect
IMG_3261.jpg


IMG_3262.jpg
 
I did the whole thing on my weekends by necessity, but found it to be a good measure of my progress sonically. each weekend would render another amount of change that i got the rest of the week to evaluate. my biggest fear was to kill the room, kill it dead!

the rest are my progress in steps

this was my first try
IMG_2690-1.jpg


IMG_2693-1.jpg


IMG_2694.jpg


IMG_2680-1.jpg
 
this was a huge improvement over the original sound of the place but after a taste of what tuning could do i wanted to go farther. i quickly decided that the small thin traps in the corners were not going to cut it and that flush mount treatments to the front wall were better served else where since boxed speaker primarily send waves away from that wall except the bass which is ported out the back, so i revised my plan and found better suppliers. the rest is the result...

again in stages of finished legs
front
IMG_06.jpg


IMG_05.jpg


IMG_04.jpg

Rear
IMG_01.jpg


IMG_02.jpg
 
IMG_03.jpg


left side with the evil duct work treated
IMG_0272.jpg


and the opposite wall
IMG_0278.jpg


IMG_0279.jpg

another thing to work around, its the only window so i had to adapt
IMG_0281.jpg
 
my desk and listening seat ive managed to get almost at 38% each from their closest wall be it front or back for best case positioning. my seat on the couch is dead nuts on, but the desk has that rolling seat so im not perfect...
IMG_0286.jpg


this wall has first reflection points for both my listing seat and my desk covered while the other wall has just the couch covered since the open door way doesnt reflect. ;)
IMG_0289.jpg


IMG_0284.jpg
 
finished this mess up today

before>>>>>>>>>>>
IMG_0283-1.jpg


IMG_0273.jpg


after>>>>>>>>>>>
IMG_0306.jpg


IMG_0302.jpg


IMG_0301.jpg


Im almost done, but still need to hang some framed stuff to keep the wife happy. she thinks im off my rocker btw, but cant argue that it sound fantastic down here now. its extremely flat. the bass is so smooth and tight, and i can bring more lows in without it becoming muddy. my highs are very crisp and clean without being fatiguing or overwhelming.

im happy boy, hubba hubba hubba!
 
thanks! i know there are a lot of unorthodox things in what im doing. i basically attempted to tune the room for a primary and secondary listening spots. the first is the couch where the best sound really lies, and the second is my desk where i work with my concert recordings, and that is why i was as extreme with treating the room evenly. one thing ive decided to forgo is treating the first reflection points on the ceiling. it sounds great now and im afraid of over deadening the front half.

the only thing left to do is to install 36sq/ft of diffuser/deflection tiles i got super cheap from a music store that was going out of business. this is a daunting task because i plan to put them on the ceiling were i cant place them and then listen to the results to decide their effect and placement(this has been my final test with everything so far, install and critique the result). im not expecting them to make as big a difference as a real diffuser, but hopefully the will give some dispersion of HFQ waves and help with flutter echo. these are the tiles im speaking of:
DSTR.jpg

dstr_1ht.jpg
 
Damn dude you didn't mess around. Glad to hear it made such a difference. If you don't mind let us know approximately what it cost to add that many panels to your room. Most people will not add that many but it will show them that it is very cost effective to treat your listening room.
 
thanks! im a bit above and beyond what normal people will do for things im passionate about, i know fully my wife reminds me often.

all told im going to have about $400 in all the panels, fabric, and glue. keep in mind that i used a muslin that was $5.99 per yard when there was some @ $2.99, and i made the mistake of buying some of the panels online which was almost double what i ended up paying for the rest from a local supplier. this could have been done for easily for $325-350. the tiles were not in the equation, but as cheap as i got them i said why not.

budget is my eternal struggle so this room had to be reasonable or it wasn't going to be. hell, budget is why i dont graduate to a higher rung on the ML ladder...but all thing considered im very happy with the Preface. its sounds damn good right now!

this morning i sat on the couch with coffee and listened to Radiohead - Kid A and let it wake me proper. Life is good.
 
this morning i sat on the couch with coffee and listened to Radiohead - Kid A and let it wake me proper. Life is good.

Jim, awesome amount of effort there. Someday we'll have to hook up so I can hear the results firsthand and see your process. I think I need to make some panels myself.

Weird coincidence? I listened to Kid A on my drive in this morning! Helped me get my head on straight too. I'd suggest you have good taste, but, well, there's that Steelers thing.
 
Steelers Rock!!

You did a nice job on the panels for your room

I hope you enjoy the improvements.
 
I wish you were here in Cocoa Beach last weekend with your cameras and recording gear. I was playing upright bass with Josh Miller opening up for G-Love. We played a set, G. Love played a solo set and then we all got together and finished the night. I'd never heard of G. Love, but we had a great jam. I didn't even know about the gig until day before. You play guitar?

Satch
 
Jim, awesome amount of effort there. Someday we'll have to hook up so I can hear the results firsthand and see your process. I think I need to make some panels myself.

Weird coincidence? I listened to Kid A on my drive in this morning! Helped me get my head on straight too. I'd suggest you have good taste, but, well, there's that Steelers thing.
lol, im the new guy in town so i take my lumps as a steeler fan....thats why the win was so damn sweet.

let me know when your ready to make panels, i know where to order them, and even help make them. ....and we certainly should get together some time soon.
 
I wish you were here in Cocoa Beach last weekend with your cameras and recording gear. I was playing upright bass with Josh Miller opening up for G-Love. We played a set, G. Love played a solo set and then we all got together and finished the night. I'd never heard of G. Love, but we had a great jam. I didn't even know about the gig until day before. You play guitar?

Satch
G-Love is taper friendly too. i would have gladly recorded ya. i record everything i see, everything.;)

no i dont play, im the classic white guy with no rhythm and cant dance. the love of an art i cant seem to make myself has driven me to to the capture. i feel like as the taper im the gateway to the audience being bigger than the one at the live event, its my place in the puzzle. i move the music forward instead of it ending after the note is played.
 
Holy smokes, you did not mess around with all those panels! I think you need a couple more panels! ;)
I guess when you are basically working with a concrete box, these are the extreme measures you have to go to to get the sound right. Wow, your wife must really love ya!
 
yep my wife is awesome for putting up with me.

lots of changes now though, i need to update this then... maybe ill have time tomorrow. i even have less panels now!
 
Back
Top